
In this post I show how to build a Raspberry Pi into a mini-ITX tower. It was a fun little project to see if I can successfully use a Raspberry Pi as a media centre.
For a quick reference, see the video on my YouTube channel here:
The idea behind the build was simple. I had an old ITX tower and an old Raspberry Pi lying around. The tower already had a mounting plate attached, which would make it easy to use as a media centre mounted to the existing wall bracket. The tower used was a CFi ACD2 with a built-in 60 Watt power supply (PSU).
As far as my research goes, the CFi ACD2 mini-ITX tower has unfortunately been discontinued. For other mini/micro PC cases a similar workflow can be followed.
I’ve added links to some of the parts used during this build. Please support our website by using these links if you were going to buy these parts – they come with no additional cost to you. Links to both Amazon.com and BangGood are supplied.
Get your Raspberry Pi 2, Raspberry Pi 3, Raspberry Pi 4 from Amazon.com.
Clearing the old case
The first step was to remove all the old PC parts from the case. Everything except the PSU and the wires were removed for now.
Wiring
When it came to wiring there were two important sets to isolate and keep, namely the switch and supplying power to the Raspberry Pi.
Wiring the on-off switch of the PSU
Firstly, the PSU needs to be able to switch on. Since we have no motherboard and its switches to work with anymore, an alternative way needed to be used. As with all PSUs, it can be switched on by bridging the PS_ON wire with ground (COM). These two wires are usually green and black.
A simple breadboard connector wire can be used to bridge these two wires directly on the connector. Many people have done this using a simple wire or even a paperclip.
By supplying power to the PSU while the PS_ON and COM wires are bridged, the PSU should switch on. These two wires will later be connected by using an on-off switch (see later).
Powering the Raspberry Pi using a PSU
The PSU can also be used to power the Raspberry Pi. Although there are probably much safer ways described on the internet, I used a direct 5V connection from the PSU and pinned it to the power line of the GPIO.
The Raspberry Pi 2/3/4 needs 5V (and preferably at least 2.5A) to power on. By testing one of the 5V lines of the PSU, by connecting a red and black wire with the DC voltage setting on the multimeter, the exact amount of voltage can be determined. The Rasberry Pi can safely take up to 5.25V DC.
Buy a budget multimeter from Amazon.com or BangGood.
By looking at the GPIO pins on the Raspberry Pi, power can be connected to pins 2 and 4. Ground can be connected to multiple pins including pin 6. I used pins 4 and 6 because they were next to each other.
By connecting power directly onto the GPIO pins, the built-in power protection mechanisms (e.g. voltage regulation and fuse protection) are bypassed, meaning that over-voltage or current spikes can damage the Raspberry Pi.
Safer ways of powering the Raspberry is by using the power adaptor (micro USB port) and the appropriate connection points on the back of the board. Both these offer protected inputs. With a bit of know-how and limitations, the USB ports can also be used.
Connecting a switch to the PSU
A simple switch for the PSU can be created using the green and black wires isolated earlier. This switch can be used to turn on the power supply when it is already connected to power. Bridging the PS_ON and COM wires is a cool trick when using an isolated PSU too.
I used 22-18AWG (red) female spade wire terminal connectors.
Buy on/off switches from Amazon.com or BangGood.
Buy spade wire terminal connectors from Amazon.com or BangGood.com
Mounting the Raspberry Pi to the chassis of the case using standoff spacers
To secure the Raspberry Pi board and to prevent contacts from touching the case, the board can be mounted onto the chassis of the tower. One can go about this in many ways, e.g. using hot glue, but I wanted a strong, non-permanent way to be able to dismantle the set up at a later stage.
For this purpose I used standard PC standoff spacers. They are available with a screw thickness of 2.5mm or 3mm, so make sure to use the correct drill bit. The drill bit needs to be able to drill metal.
Buy standoff spacers set from Amazon.com or BangGood.
To drill the hole in the correct placed I used an old piece of cardboard as a template. Before the holes are drilled, it should be noted that the Raspberry Pi should be mounted in a way to allow enough space for the HDMI cable and the USB ports to be used.
Creating a side panel
To end things off, I decided to make a side panel that will hold the switch and secure the HDMI cable. By closing the side off, less dust will also be able to enter the case.
There are, once again, many ways going about creating something like this. I decided to go with a 3D printed solution. Measurements were taken of the chassis, the HDMI cable and the switch and I used Tinkercad to make two simple side panels.
The panels were printed using my Tevo Tarantula 3D printer using white PLA filament.
End result – final thoughts
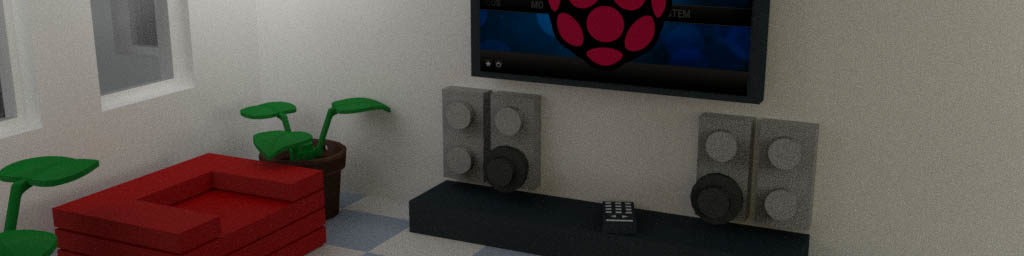
I was fairly happy with the overall build. The Raspberry Pi was working fine and the case fitted in nicely next to the TV it was connected too. The only thing I could have done better was tweaking the side panels to cover the entire side of the case.
If there is anything you would have done differently, or there is anything that is not discussed clear in this post, make sure to tell us in the comment section below.


